How to make a sniper rifle. Part 6: Selecting a scope mount.
Mounting a scope is by far the most challenging issue when dealing with Mosin Nagants.
The rifle was designed before scopes were used in combat, and made before they
became accessible to an average soldier. In WWII rifle scopes were present on
only a tiny percentage of weapons specifically designated as sniper
rifles.
This is why, unlike a typical modern military or hunting
rifle, a Mosin you can buy today has no way of mounting a scope - the
exception being "sniper" variants which I will discuss below. To mount a scope
the rifle will need to be modified to various degrees, some scope mounts
requiring more, and some less.
In this post I discuss various mounting
options in detail.
"Authentic" military mounts
I have already pointed out, in the buying section
that you can get a "sniper" version of Mosin Nagant with the scope pre-installed
for $400-$500. These are not actually true sniper rifles from WWII, but rather
standard issue Mosin Nagants with a reproduction scope added recently.
Judging from what I have seen at the range, these rifles can be spectacularly
inaccurate (the dispersions I've seen with people shooting them were as bad
as 10 inches at a 100 yards).
There is a small number of authentic sniper rifles on the market with real WWII
scopes. You should expect to pay around $800-$1200 for them.
There are two types of military scopes for Mosin Nagant. The first one, used mostly in the late
1930s, was called PE. It has a 4x magnification, a German post reticle, a
design that is similar to a modern rifle scope, and mounted directly on top of
the receiver.
The mount itself was attached to
the receiver with 6 screws. After the mount was attached, the iron sights could
no longer be used.
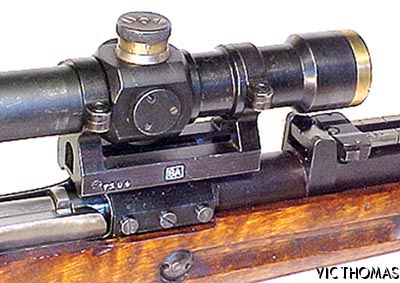
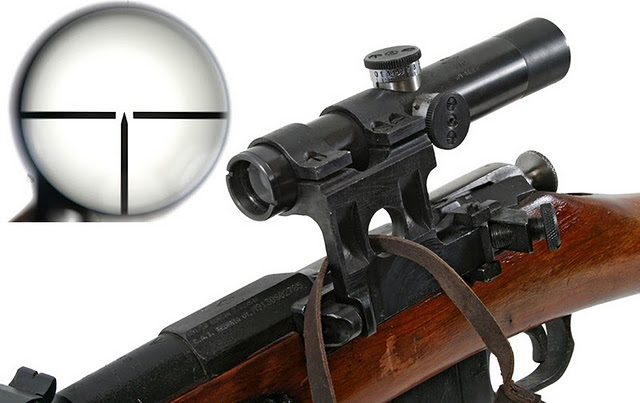
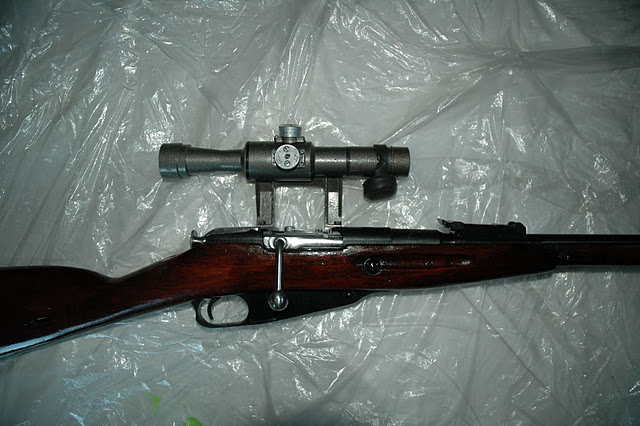
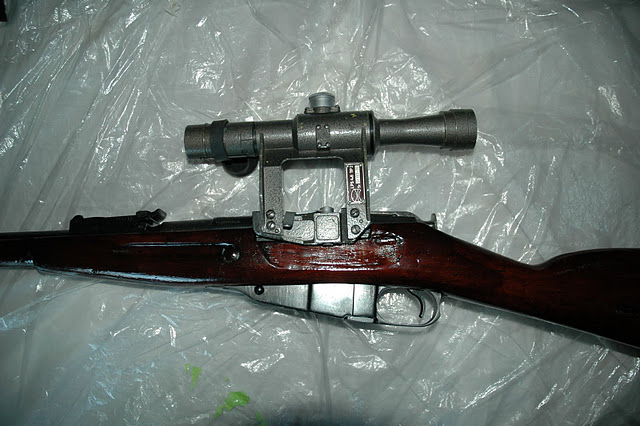
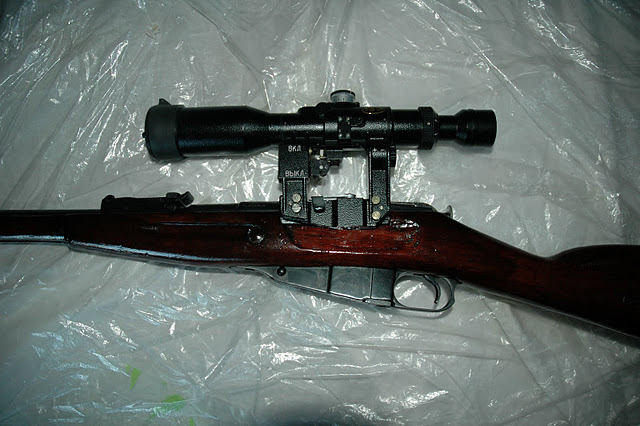
During the WWII this scope was replaced by a
side-mounted PU scope. It has a slightly lower magnification of 3.5, and a
"flat" design where the diameter of the scope tube is the same as the diameter
of the objective.
While PE mount can be used with
more modern scopes (with 30 mm tube diameter) - provided that the bell fits,
since the mount is low, - the PU scope design depends on the scope's objective
being the same diameter as the tube, since the scope band is one piece and only
has tightening screws on one side:
So it really only works with the
original scope. The advantage of PU mount is the side rail which allows quick
removal of the scope. Also, the mount allows the use of iron sights even when
the scope is attached. However, installing the side rail requires modifying the
stock.
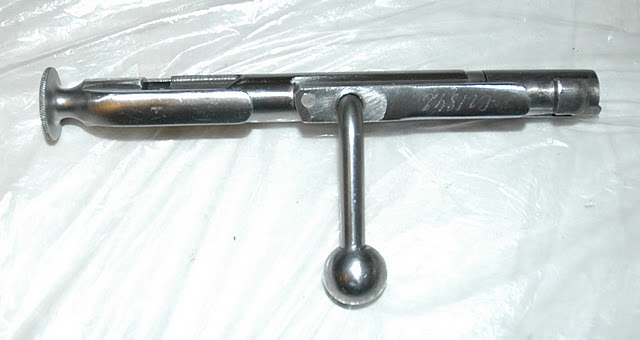
Both mount types require the use of
a special "turned down" bolt, since when opened, the bolt handle sticks upwards
and would interfere with the scope. This is true for any scope mount, except the
scout mount discussed below.
Full overview of Soviet military
scopes can be found here: http://www.mosinnagant.net/sniper%20section/snipertext1.asp
While "authentic" scopes can be interesting as historical pieces of militaria (unless,
of course, you install them yourself using reproduction parts), they have many
disadvantages when it comes to actual shooting.
First, they have very low magnifications (3.5 for PU and 4 for PE). While it might be sufficient
for human targets in the war, I hope that most people today would be shooting at
paper, and you won't be able to even see a 1 inch target dot at a 100 meters
with only 4x magnification.
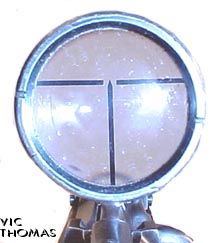
Second, when the scope is sighted to adjust
for the difference in the direction of the scope mount and the barrel, since
even a tiny level of non-collinearity will lead to large difference in point of
impact, in a modern scope the field moves and the cross-hair stays
centered. In these older designs the cross-hair moves, so you end up with it
off-center, sometimes significantly off-center.
And even if by magic your
horizontal axis is the same, when you are shooting long distance you have to
compensate for the bullet drop, so you will end up with this:
For these reasons I do not
recommend using PU/PE scopes and instead go with more modern
alternatives.
NOTE: There are after-market brackets that replace the very
top of the PU mount with rings that can hold the standard 1" tube available
on eBay. This allows using a modern scope with the PU scope
mount.
HOWEVER, the mount was designed for a small, light scope, and so
the base of the scope (the distance between the rings) is rather small. Mounting
a large, heavy modern scope on these rings, coupled with a very heavy recoil of
Mosin's 7.62x54r cartridge would almost certainly exert a very high stress on
the scope tube, the scope will shake excessively, and will be more likely to
fail.
Scout mount
Scout scopes have a very long eye relief - the distance between the eyepiece and the
eye - so the scope can be mounted forward of the receiver.
For Mosin Nagant this setup is
extremely convenient. The scout scope does not interfere with the bolt handle,
so it does not need to be modified. It replaces the iron sights and is mounted
using the hardware that goes into the iron sight mount - so there is no need to
drill anything or cut the stock. The mount itself is just a cheap piece of metal
and can be had for $12-$14 on ebay.
Despite the ease of installation, I do not recommend it for the following reasons.
First, the maximum magnification that is available in scout scopes is 7x. At this magnification
most of 1" dot is covered by the cross-hairs at 100 yards, so getting to below 1
MOA is very challenging.
Second, only very few scout scopes are
available, mostly the cheaper ones, and the cheap scopes are known to not hold
the impact point very well.
Third, the mount itself holds on friction
from several adjusting screws, and tends to come loose. It will certainly come
loose after the first couple of shots, and you will have to remove the scope
(because the adjusting screws on the mount are directly below it), retighten the
screws, and remount the scope. This has to be done several times, and even after
that I have doubts about how good the mount is capable of holding
zero.
Finally, the iron sights are removed with this mount and are not
usable.
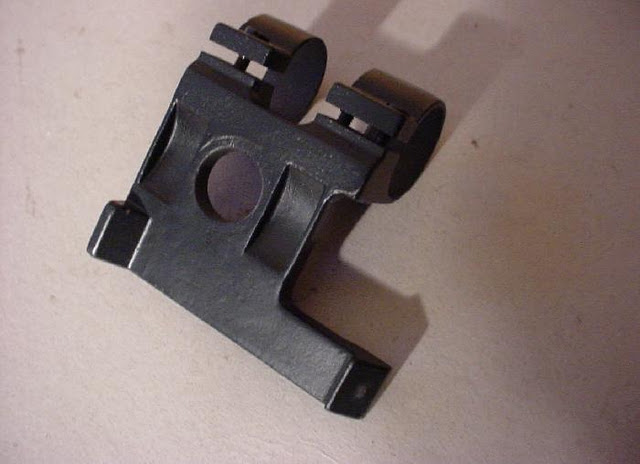
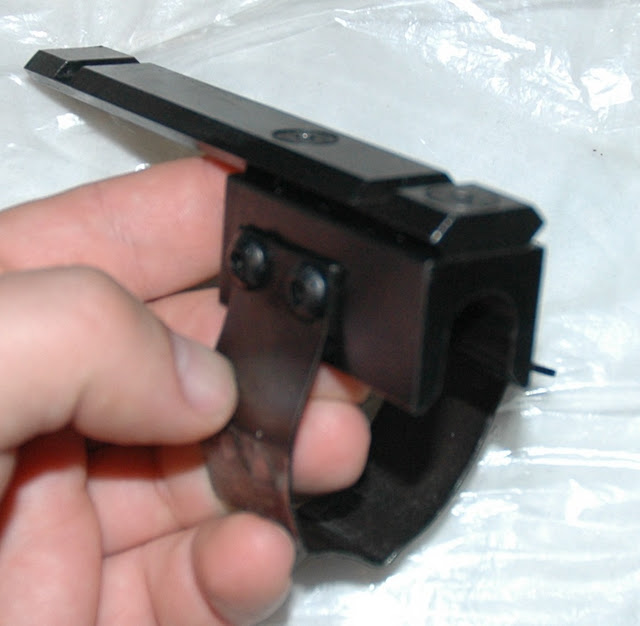
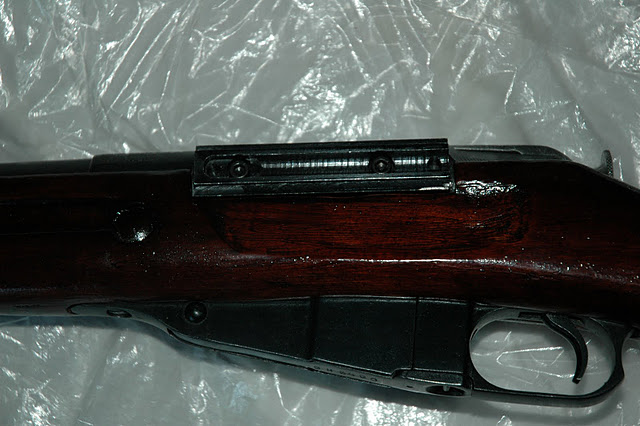
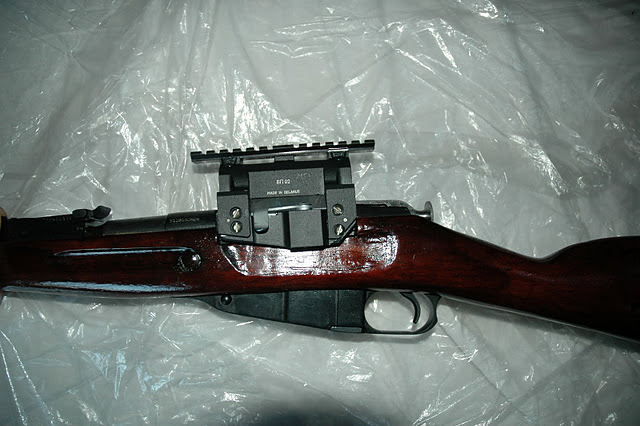
Metal band retainer
This type of the scope is produced by an individual, not a company, and
occasionally pops up on eBay for $80-$90. It consists of a base that is held on
top of the receiver by a metal band wrapping around the receiver. This is
another example of so called "no gunsmithing required" scope mount kits, the
first being the scout mount.
This is what it looks:

...and...
Here is how it gets installed:
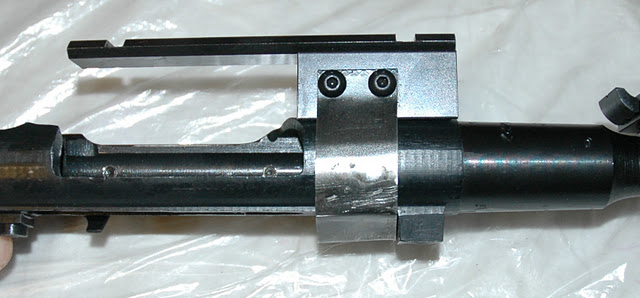
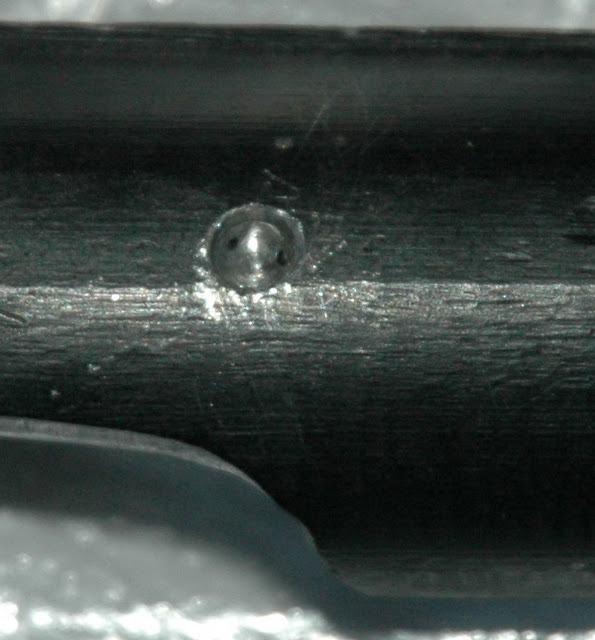
The only modification necessary for
this mount is dremmeling out a tiny amount of wood from inside the stock to make
space for the band.
You still do need to modify the bolt handle because
the scope mount hangs directly over the bolt, and interferes with it when the
bolt handle is raised. I will write more about turning the bolt handle in the
following article.
This mount is easy to install and allows using any
modern scope. However, it does not work.
When the receiver heats up when
the rifle is fired, the expansion coefficient of the receiver metal is different
from that of the retaining band. So the band gets stretched a little bit, and
when the rifle cools back, it comes loose, so the screws that hold the band need
to be retightened constantly. With every tightening the base slides alongside
the receiver a little bit, and the impact point moves.
I do not recommend using this scope mount at all.
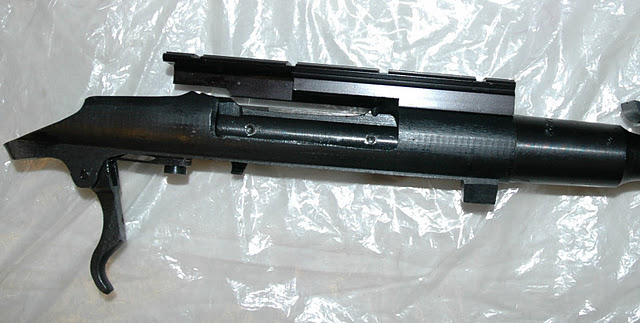
ATI scope mount
ATI kit requires drilling the receiver and replacing the bolt
handle to install the scope. This is relatively demanding project, but it
results in a mount that is better than any discussed previously. With this mount
I have gotten pretty close to my 1 MOA goal.
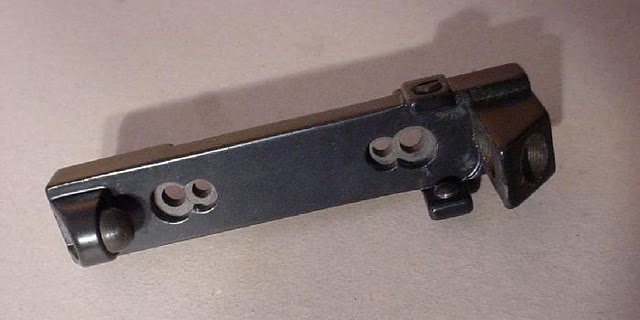
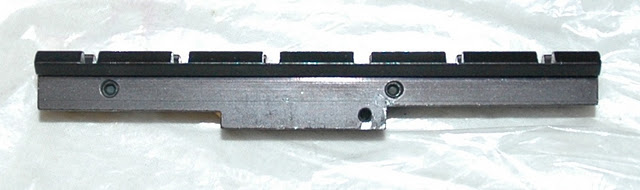
The kit consists of a
bracket that gets screwed on top of the receiver, the bolt handle, and the
hardware (drill bits, a tap, and screws) to get everything installed. It costs
in the vicinity of $40.
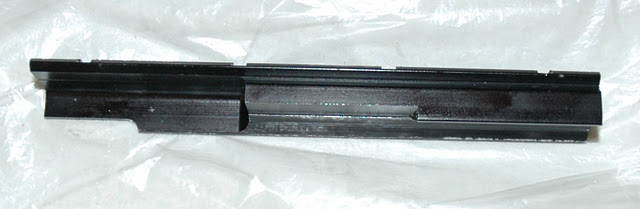
This is the bracket piece from the side...
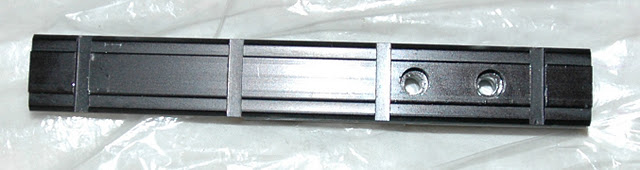
...the top...
...and installed.
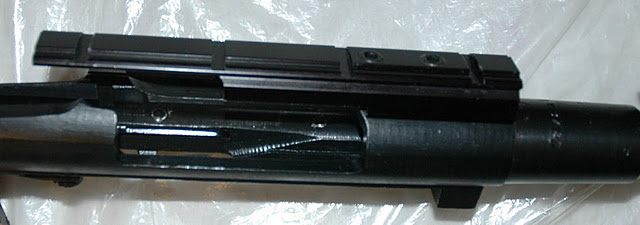
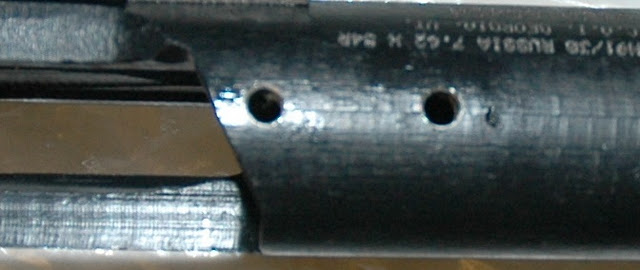
The receiver is drilled on top to screw the base in as follows:
The bracket hangs very low over the
receiver (which is a good thing, because the distance between the optical axis
of the scope and the axis of the barrel is best minimized) so the standard
turned down bolts do not work, and you need to use ATI bolt handle.
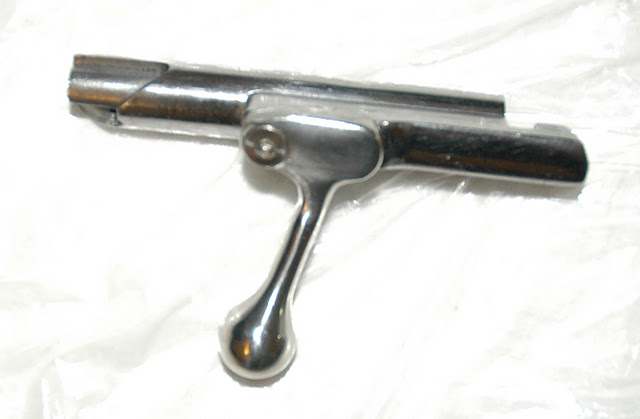
The result does not look amazingly
beautiful, but it does work. Because the bolt handle is turned down almost at
the right angle and almost at the base of the bolt, the stock needs to be
notched a bit to let the bolt close.
The drill press is absolutely
required to drill both the handle and the receiver - do not even think about
doing this with a hand drill!
Advantages of this kit:
- It is relatively cheap.
- It provides reasonable base that minimizes the momentum
exerted on the scope during the recoil.
- It requires minimum modification of the stock.
- The result is reasonable stable and holds zero well.
Disadvantages:
- Aligning the bracket to the top of the
receiver is very, very hard. Ideally, the bracket should be collinear to the
barrel, but there is no way to actually measure this. Also, the top of the
receiver is not necessarily symmetric, or aligned with the barrel, so the
contact between the bottom of the bracket and the receiver will orient it in a
direction you might not be able to control. When I installed mine, it was
misaligned so much that I had to use adjustable rings to compensate (Millet,
$30). The problem with these rings is that because of the ring design one cannot
remove and reinstall them without losing zero, so the scope has to be
permanently affixed to the rifle. This is the reason why I eventually
gave up on this way of mounting the scope.
- You have to have a drill
press. A cheap one (~$120) will do, but it is absolutely required.
- Aligning receiver in the vise on the drill press is hard. It has to be exactly
perpendicular to the drill bit, and because it is curved, it is a
non-trivial exercise. Drilling requires cutting oil which is not widely
available (I was finally able to find it in Lowe's).
- Take extra care when tapping the receiver. If you turn too hard, or don't use cutting oil,
the tap bit will break and you will end up with the hole that is plugged by a
bit of hardened instrumental steel which is impossible to extricate.
Overall, the ATI kit is an
acceptable way to mount the scope IF you do not require removing and
reinstalling the scope frequently (or you are extremely lucky and the shape of
your receiver aligns with the barrel perfectly).
Dragunov side rail
This is by far the most
expensive and the hardest to install scope mount, but it gives the best overall
results.
Side rail installs on the side of the receiver as follows:

It does require not only drilling
and tapping the receiver, but extensive modification of the stock, including
refinishing.
Once installed, however, a wide
variety of scopes and scope mounts designed for Dragunov (and its AK clones
such as PSL54c and Zastava M76) will work for your rifle.
For example, this is a bracket that allows installation of any scope with Weaver rings:
...or a Romanian LPS scope (4x, ~$100 currently at
http://www.jgsales.com/)...
...and finally Russian POSP scope from
http://www.kalinkaoptics.com/...

As I pointed out above, this is the
hardest to install mount, but is preferred as far as quality and versatility of
the outcome goes. I will cover the installation, including procuring all the
parts, in the next post.
Contents
- Introduction
- Buying
- Cleaning
- Disassembly
- Accurizing
- Selecting a scope mount
- Mounting a side rail
- At the range